This beautiful croptop in pink color is perfect to match with your other clothing and good to pair with your favorite jeans, shorts or skirt and perfect for summer outfit.
For this top I used 8ply but soft yarn, and it turned out beautiful.
This size is for cup medium size, you need to adjust sizing depending on the sizes of your bust,
with adjustable ties on the neck and back.
This is one size only for medium size Cup width of B/C which is (5”or 6”)
Stitches used and is in US terms:
Dc- double crochet
Sc - single crochet
Picot - Top of dc, ch4, then sc first chain of ch4
Ch1 space - is the point (2dc,ch1,2dc)
Hdc - half double crochet ( for the strap)
Materials I used:
3mm hook
8ply Stallion 100% acrylic yarn ( 100g)
Scissor
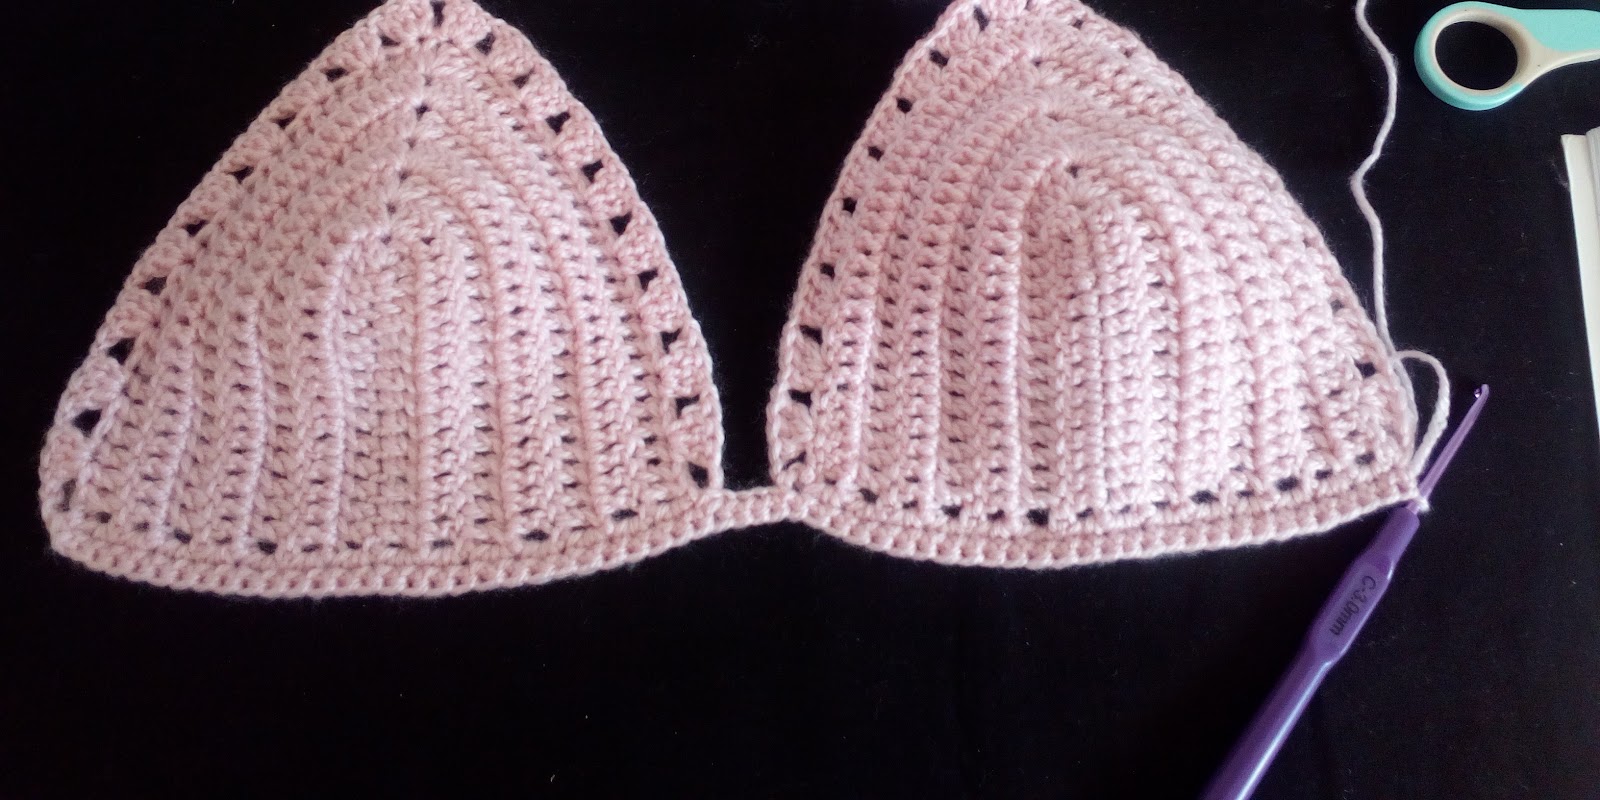
For the bra cup pattern: (make 2):
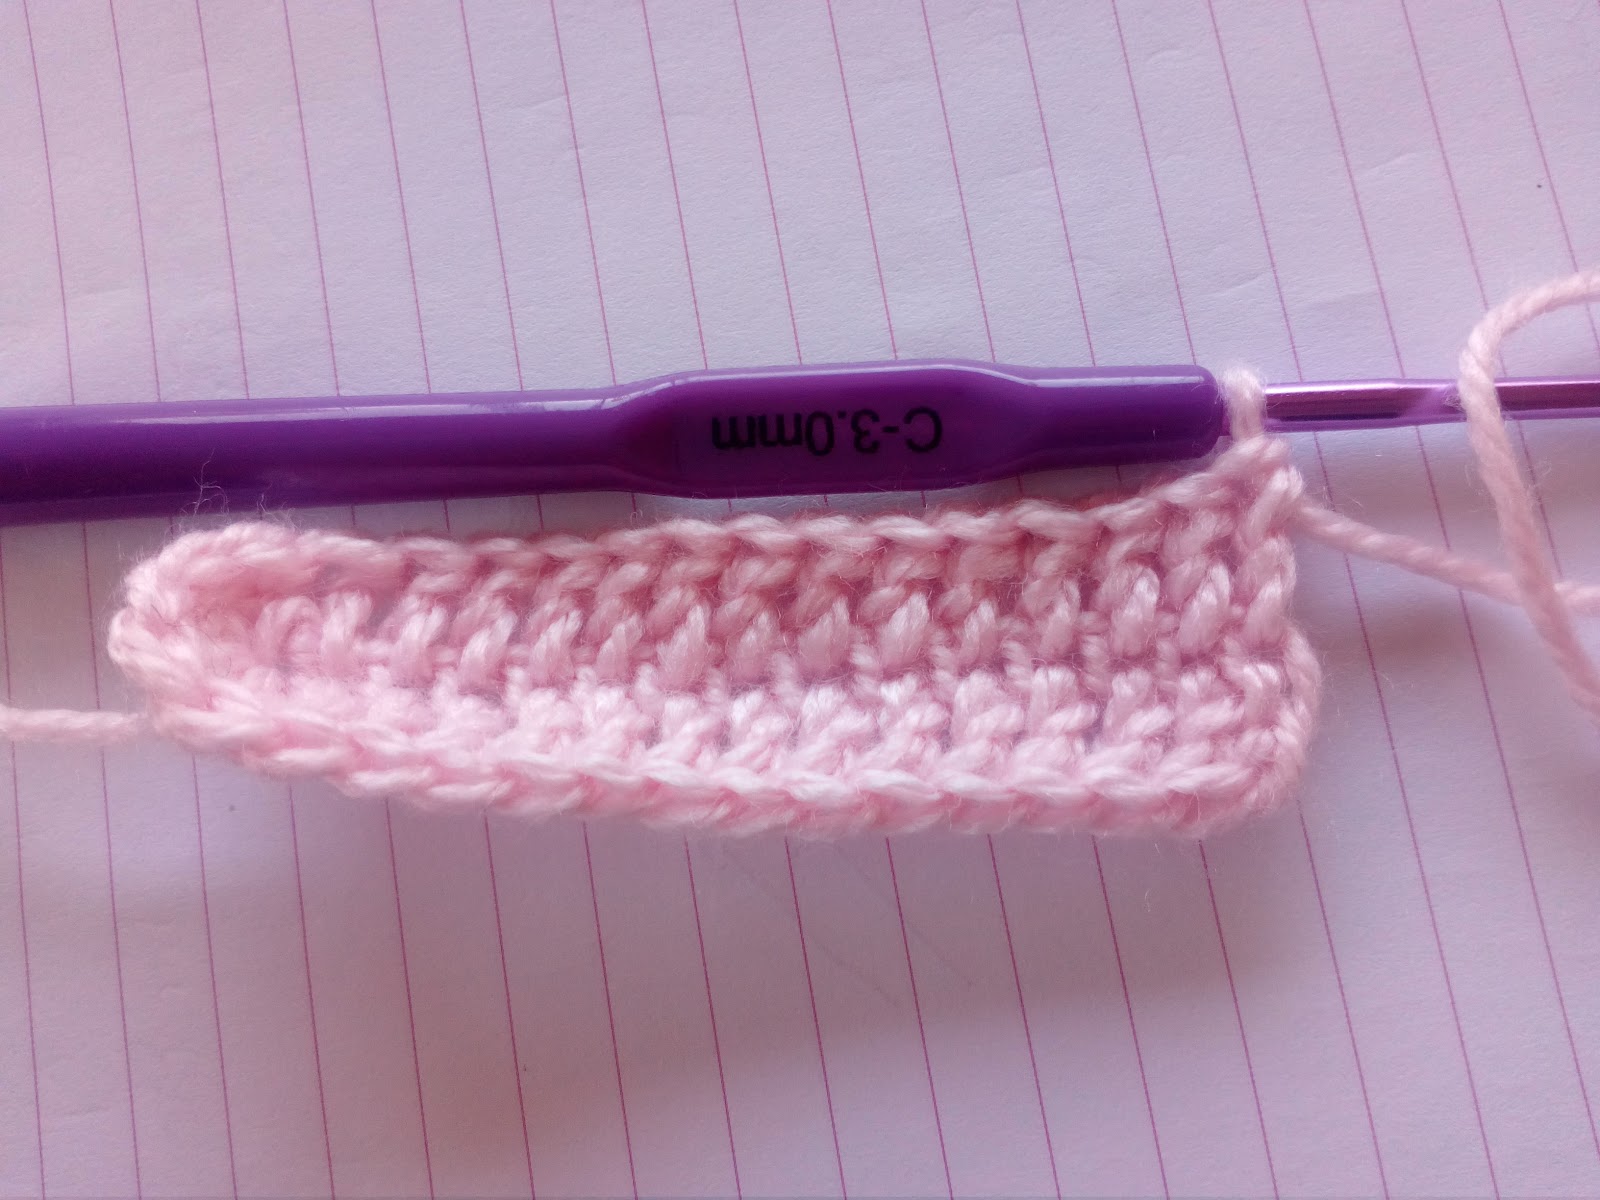
Row 1: Ch17, dc to the 4th chain from hook
Row 2:
dc next st, dc all the way to the next 12 sts, (2dc,ch1,2dc) last st.
( this is the point of the bra) put marker if necessary.
Row 3: Working in the opposite side
Dc to the 13th sts, dc last st (14sts)
Row 4: turn your work
Ch3 ( count as first dc)
Dc to the next 15 sts (16 sts total)
when you reach middle point (work 2dc,ch1,2dc) same space
Dc next st and to the next 15sts, dc last st.
(16 sts total) turn
Row 5:
Ch3 (count as first dc) dc to the next 17sts
(2dc,ch1,2dc) to the ch1-space
Dc next st, and to the next 16 sts, dc top of ch3
(18 sts total)
Row 6:
Ch3 (count as first dc) dc to the next 19sts (20sts)
(2dc,ch1,2dc) to the ch1-space
dc to the next 19 sts, dc top of ch3 (20 sts total) turn
Row 7:
Ch3 (count as first dc) dc to the next 21sts (22sts)
(2dc,ch1,2dc) to the ch1-space
Dc to the next 21 sts, dc top of ch3 (22 sts total) turn
Row 8:
Ch3 (count as first dc) dc to the next 23sts (24sts)
(2dc,ch1,2dc) to the ch1-space
Dc to the next 23 sts, dc top of ch3 (24 sts total) turn
Row 9:
Ch3 (count as first dc) dc to the next 25sts (26sts)
(2dc,ch1,2dc) to the ch1-space
Dc to the next 25 sts, dc top of ch3 (26 sts total) turn
Don’t fasten off and we will work the
shell stitches for the side of bra cup.
For the side of the bra cup
ch3, *skip 2 sts, 3dc next st, ch1 repeat from* all the way to the end.
Ending with skip 3 sts, dc last st. Fasten off
Repeat for the second bra cup, but when you finished, don’t fasten off
Working at the bottom of the second bra, work 2 sc in every space, where the last dc,
you should have 28sc in total, sc to the next space,
now connect to the first bra cup (29sc total)
Ch3, connect to the first bra cup, sc to the first space,
then 2sc in every dc space to the end.(29sc total)
Turn, ch1, sc same space and work sc in every sc until the end.
Don’t fasten off (62sc)
For the body of bra:
Row 1:
Ch5, skip 3sts, sc next, *ch5, skip 3sts, sc next repeat
from* ending with ch5, skip 4sts, sc next st. turn
Row 2:
ch5, sc to the 3rd chain of ch5, *8dc to the next ch5space,
sc next ch5 space, ch5, sc next ch5 space
repeat from* to the end, ending with ch2, dc last st.
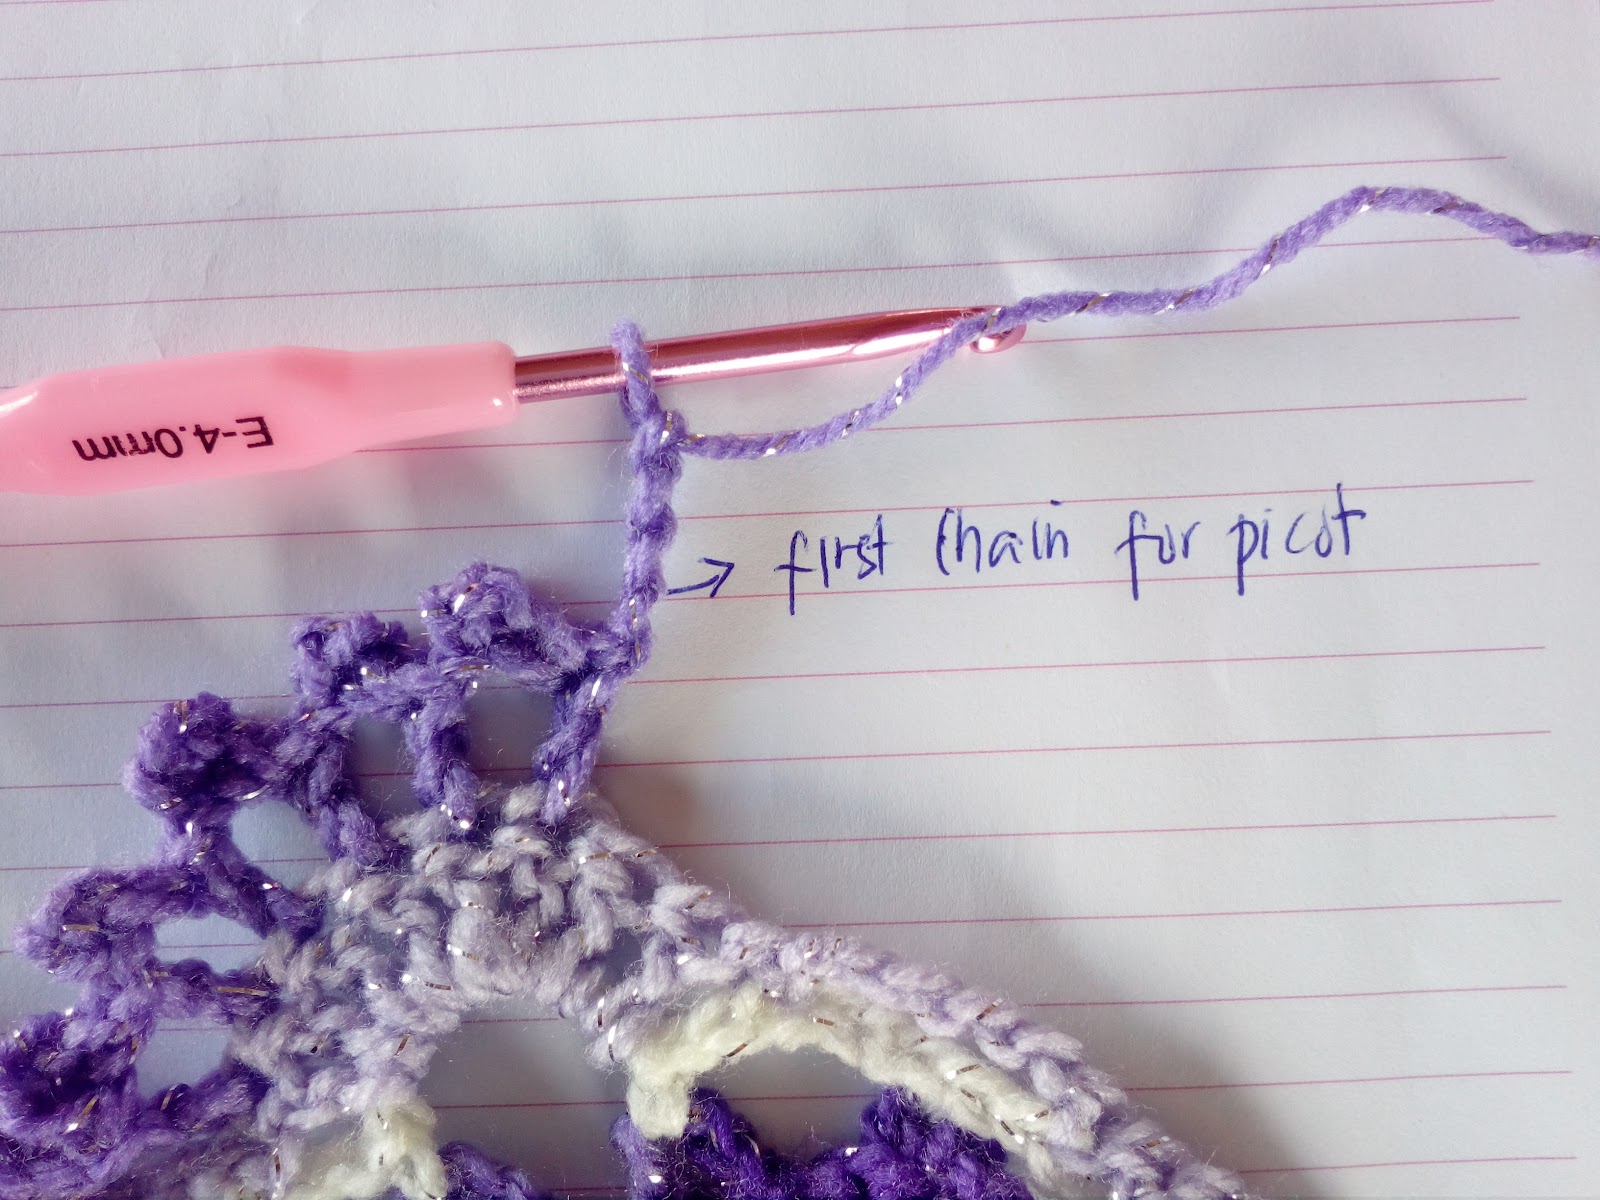
Row 3:
ch3, *work, dc,picot,dc next dc in the shell part, you
should have 7picot here,sc 3rd chain of ch5 space,
repeat from*to the end. Dc 3rd chain of ch5 space.
Sample on how to do the picot
Row 4:
Ch5, skip first picot, sc to the top of 2nd picot, ch5,
skip picot and sc to the top of next picot, repeat once,
then ch5, skip last picot of first shell,
skip picot of next shell, and sc to the next picot
Repeat from* to the end, ending with ch5,
dc last chain.
Row 5:
Ch6, skip ch5 space, work sc 3rd chain of ch5 space,
*ch5, sc to the 3rd chain of ch5, repeat from* to the end.
Repeat from row 2 until you have your desired body cover.
For the strap:
Insert hook in between the 3dc’s, ch80 or more,
hdc to the 3rd chain from hook all the way down,
slip stitch to the next space of between the 2dc,
repeat for the other cup.
For the side strap
Working in the side where the sc part, ch80 or more,
hdc to the 3rd chain from hook all the way and sl st to the same space.
Repeat for the other side and you’re DONE!
*This is a one size only, if you want to increase it,
make sure your body part is divisible by two.
*Hope you all enjoy making it, have fun
*Please share your finished product in my facebook page
Thank you and happy hooking!
Milina


 😊
😊 😃
😃